Brief: this CMS version provides a complete developed system to manage members in an advanced manner. This system is perfectly used by websites owners who set every member permissions specifically allowing them to publish, edit, or adding comments. Besides, this feature is very useful for the companies owners that are interested in seperate the internal employees content from the external one that is shown for the visitors.
Adding member:
To add new member, follow the below tutorial:
From the control panel> user’s manager> then add as shown in the below picture:

The below template will show up:
User Profile:

-Display Name: the displayed name on the profile and website pages.
-Username: the name used for registration.
-Password: the password used to register on the website.
-Email: the user email address that is used to send and receive messages.
-User Title: a title shown beneath the username.
-Gender: choose the member gender (male, female).
-Usergroup: enter the group to which this member belongs.
-Verified Account: a feature that enables you to approve the membership, such like the official memberships that assures the membership authenticity.
-Default Style: select the default style that is shown to the member.
-Default layout: select the default layout that is shown to the member.
-Time Zone Offset: choose the time zone based on the member’s location.
-Enable Daylight Saving: is the daylight time is the approved one in the selected location that is previously set, activate this option for a right shown time.
-Date Method: choose the date method whether it is Hijri or Georgion.
-Beginning of the Week: select the first day when the week starts.
Edit Profile Options:
-Public Username: is shown in the profile URL. for example, if you choose (Dimofinf) , the URL is shown as below:
www.website.com/profile/Dimofinf
Noting that it has to be free of numbers and not used by another member.
-Country: choose the country of the member.
-City: set the city where he lives.
-Phone/Mobile/Cell: enter his mobile number.
-Homepage: the link of the homepage.
-Words of Wisdom: enter a word that describes the new member.
-About Me: enter a brief about him.
-Facebook ID: enter his Facebook profile link.
-Twitter ID:enter his twitter profile link.
-linkedin ID: enter his linkedin profile link.
Skype Name: enter his skype profile link.
Image Options:
-Avatar: this one is optional to set an avatar “default image” for the member or not.
-Upload Image From Your Computer: is used to upload the profile picture which is optional as well.
Press (Submit) to save, or (Reset) to re enter new data.
List member:
To list member, follow the below steps:
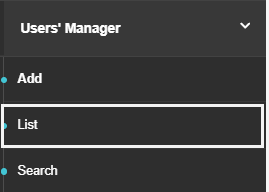
From the control panel> user’s manager> then list as shown in the below picture:
The below template will show up:

-Press the member’s name that you want to edit his data, and you are transferred to the page of the previous template.
-press the email address, and you are transferred to the mailing center to send him a message.
Admin User Action
When the member’s page is opened using the control panel, it facilitates several actions such as (sending the verification code, send a password reminder, or delete the user) as shown in the below picture:

Searching for members:
To search for a member, follow the below:
From the control panel> user’s manager> then search as shown in the below picture:

The search page will show up, noting that Dimofinf V.5 is providing various methods of advanced search.
Quick Search: press any item of the displayed list, and the included members will show up accordingly as shown below:

Advanced search: searching for a certain number by his username and membership group.

General Search: is used to search for members that have the same characteristics such as country, joining date, etc, as shown in the below picture:

You can as well choose the available fields to be used in searching by activating or deactivating any of them as shown in the below picture:

Additionally, you can set the search results number that is shown in one page and the members displaying order as shown in the below picture:

 Please Wait...


