Brief: this plugin allows you to create new pages on your website such as (who are we?) and (registration conditions).
Firstly: Pages Plugin Settings:
1-Log in to the control panel
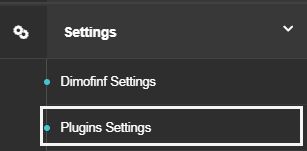
2-From the setting list, select (Plugins settings) as the below picture:
3-A list will show up, choose (Auto Slider settings) as shown below:

The below setting options will show up:
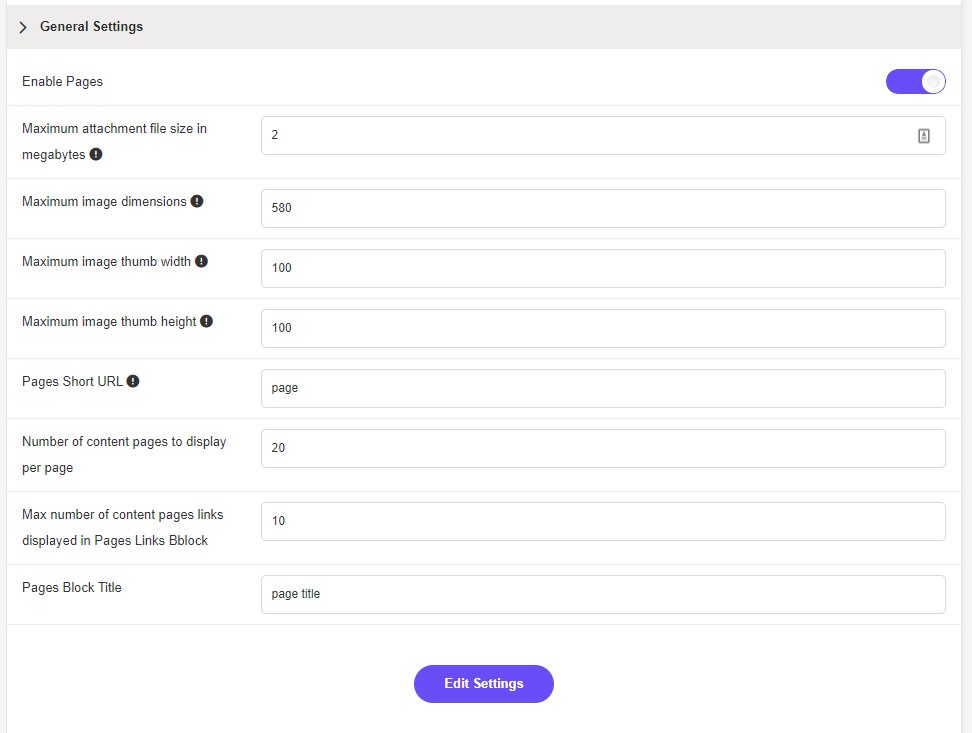
-Enable Pages: activate or deactivate this plugin.
-Maximum attachment file size in megabytes: set the maximum size of uploaded files.
-Maximum image dimensions: any uploaded images will be resized as per the set dimensions.
-Maximum image thumb width & height: the image thumb is automatically created based on the width and height that you set in these options.
-Pages Short URL: the website address refers to the domain such as (www.google.com), adding any pages to the website can make this address longer and contain numbers and symbols which make it hard to be memorized.
Short URLs make it easier to reach the website pages by adding a key word beside the domain to refer to the required page. For example, if you want to refer to the plugin (page) you can enter the key word (page) in this field, noting that it will be shown after the website address.
-Number of content pages to display per page: set the number of included pages.
-Max number of content pages links displayed in Pages Links Block: set the maximum number of pages displayed in the pages links block.
-Pages Block Title: enter the title of the pages block.
Press (Edit Settings) to save.
Secondly: To add a new page, follow the below:
From the control panel> select plugins> pages> then add as the picture below:

The below template will show up:
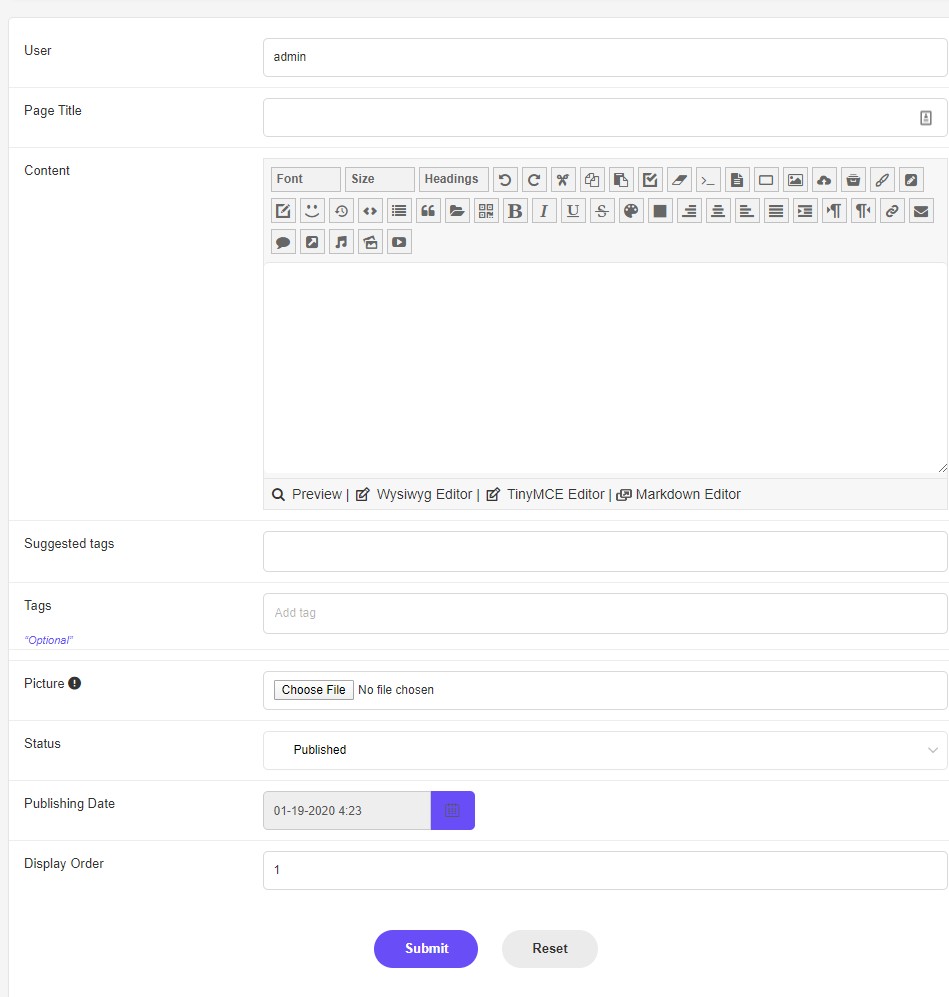
-User: enter the member name that the content is published on his behalf.
-Page Title: enter the new created page title.
-Content: enter the page content.
-Suggested tags: keywords are words used for searching in any browser. Accurate selection of these words helps in SEO and attract more visitors to your website.
-Picture: you can upload a picture to be displayed with the content.
-Status: set the page status to be published or pending for approval.
-Publishing Date: set the publishing date that is displayed on the website.
-Display Order: set the page displaying order, and it ill be shown accordingly.
Press (Submit) to save, or (Reset) to re enter new data.
Secondly: To list, edit, or delete pages, follow the below:
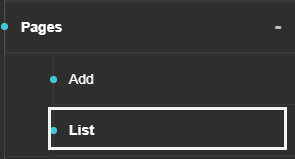
From the control panel> select plugins> pages> then list as the picture below:
The below picture will how up:
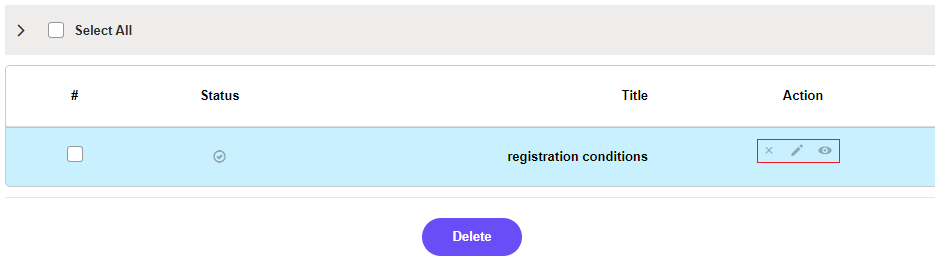
-View Icon: is used to show the page on the website.
-Edit Icon: is used to edit the added pages.
-Delete Icon: is used to delete the added pages.
Fourthly: The plugin block displaying method on the website:
The block (Pages) can be added to any location on the website using the default layout, for more details, click here
 Please Wait...


