Brief: Every module has a setting through which you can manage the general settings of its sections and available blocks.
To login to “Blog” module settings:
1- Login to the control panel
2- From the side list, select (Settings), then (Plugins Settings) as shown in the below picture:

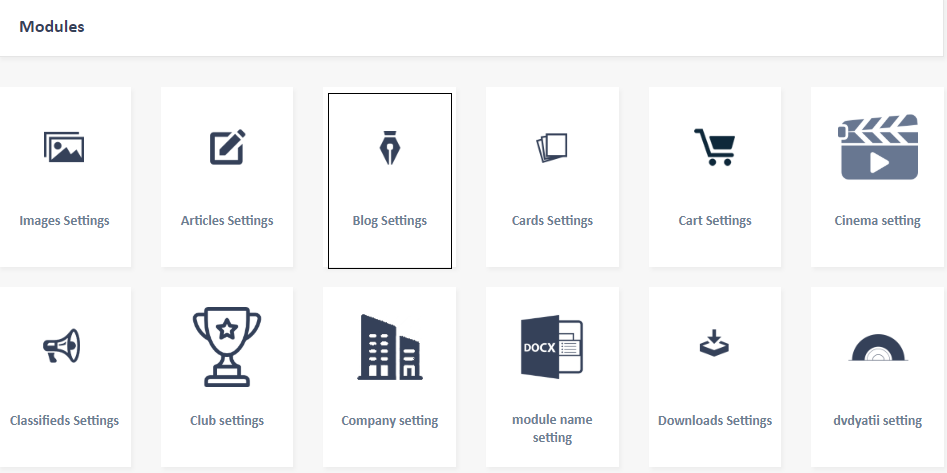
3- The below list will show up, select “Blog Settings”:
The below page of general options (Settings) will show up:
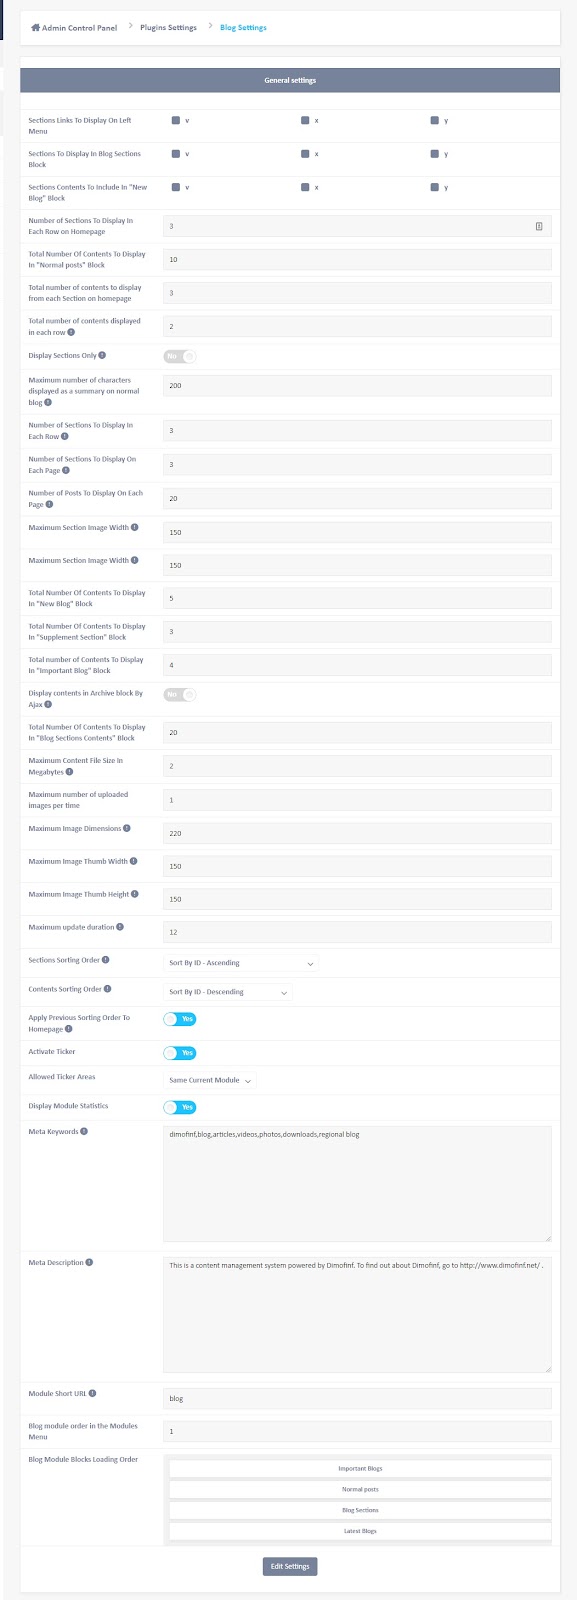
The first three options allows you to select the article sections that will be shown in the list and blocks of the website content.
-Sections Links To Display On The Left Menu: set the articles sections that will be displayed in the side list.
Noting that, if you don’t choose sections, article module will not show up in the side list.
-Sections To Display In Blog Sections Block:The block of (Blog Sections) displays blog existed in blog module whether it is included in internal pages or the homepage.
-Sections Contents To Include In "New Blog" Block: this block adds the most recent blogs to sections that you select.
-Number of Sections To Display In Each Row on Homepage: if you have the block (Blogs Section) on the homepage, you are allowed to manage how to display section in the block.
In addition, you can set the number of displayed sections in every row.
-Total Number Of Contents To Display In "Normal posts" Block: if you the block (Normal Posts) on the homepage, this feature allows you to set the number of displayed contents in the block.
-Total number of contents to display from each Section on homepage: you can manage the number of contents for blog blocks on the homepage.
-Total number of contents displayed in each row: you can set the number of contents for each row in every block. This feature is very important if the option (show sections only) is displayed.
-Display Sections Only: if you have the block (Blog Sections) on the home page and you want to display section without content, activate this option.
Maximum number of characters displayed as a summary on normal blog: control the blog size by setting a certain number of characters allowed.
This feature is useful when you have a group of editors and you need a guarantee not to exceed a limit of added blogs.
-Number of Sections To Display In Each Row: manage the number of displayed sections in every row on the internal pages of the blog.
-Number of Sections To Display On Each Page: set the number of displayed section in every page. If there are 10 sections and you set 5 section for each page, so you will have 2 pages for sections. A numbered list of pages shows up beneath the sections.
-Number of Posts To Display On Each Page: set the number of posts to be displayed on every section page.
For example, if you have 1000 posts for every section, and you want to show 20 ones in every page, so that you will have 50 pages in this section. A numbered list of pages will be shown beneath the posts.
-Maximum Section Image Width & Hight: set the image width and height, considering that they should not exceed 150 for the image quality.
-Total Number Of Contents To Display In "New Blog" , "Supplement Section" & "Important Blog" Blocks: these options allows you to manage the number of contents displayed in every block.
This feature is useful when you have a large number of posts and you need to limit the number of published contents as per as the website design and style.
-Display contents in Archive block By Ajax: activate this option to archive the blog contents by date, and save them in the archiving block.
-To activate the archiving block: activate the default layout, select (Add Block) > select (Blog) from the dropdown list, then drag it to another location on the page. Now the archiving block has been activated.
Note: this feature is very important for large websites, that have numerous visitors. It reduces browsing time and the server pressure.
-Maximum Content File Size In Megabytes: control the maximum size of uploaded file.
-Maximum number of uploaded images per time: Dimofinf V. allows you to upload unlimited number of pictures.
This option allows you to set a certain number of uploaded pictures for every post, noting that if you upload multiple pictures, they will be displayed in a slider.
-Maximum Image Dimensions: the image will be automatically resized to the set dimensions.
The picture dimensions determine the picture accuracy. The more the picture dimensions increase, the more space you need.
-Maximum Image Thumb Width: (Thumbnail images) if little size of the original pictures that you upload to the website, those little images are displayed on the website pages except for the content page for the website speed.
Set the thumbnail images width and height to be maximum 75.
-Maximum update duration: the blog is edited after a certain number of hours.
This option allows the icon (updated) to be shown.
The icon will be automatically deleted after the set hours pass.
-Sections Sorting Order: set the order you want to display sections by selecting one of the methods existed in the dropdown list. .
-Contents Sorting Order: set the order you want to display contents by selecting one of the methods existed in the dropdown list.
-Apply Previous Sorting Order To Homepage: activate this feature to apply the previous blocks settings to existed one on the homepage.
Don’t activate this feature if you want to display the homepage blocks differently.
-Activate Ticker: it allows the recent posts to be displayed automatically.
-Allowed Ticker Areas: set the allowed locations to show the ticker; whether to be shown only on the internal pages, homepage, or all the pages.
-Display Module Statistics: the (Statistics Block) is a main one that is not belonged to a certain module and can be added to any page.
This block shows the number of contents of every module and the date of the recent added content.
-Meta Keywords: enter meta keywords that fit the blogs module, to be included in every content published on the website pages.
Use this feature if you want to add meta keywords to all the module contents that has no previous meta keywords before being published.
-Module Short URL: short URLs help in reaching the website pages easily by adding a keyword beside the domain. For example, if you want to refer to the articles module pages, enter (blog) in this field as shown below:
Note: every short URL has to be used once, and does not include numbers or Arabic alphabet.
-Blog module order in the Modules Menu: set the module order in the website modules list.
-Blog Module Blocks Loading Order: this feature provides a priority for a block you want to be ordered firstly. For example, any new article will be added to both (Blog Sections) and (New Blog) block, so you can select where the blog will be published firstly.
Press (Edit Setting) to save.
-Blog Displaying Method: to display the blocks of the module, press the icon (List) in the header, activate default layout, then press (Add Block), use (Filtration or searching feature to display blog blocks only), then drag the block to set it desired location.
For more details about how to use the default layout, press Default Layout Explanation
 Please Wait...


