Brief: this plugin enables you to add banners and advertisements on the website and manage them using an improved control system. In addition, this plugin has been developed to display banner in a slide.
Firstly:Banners Settings:
1-Log In to the control panel
2-From the setting list, select (Plugins settings) as the below picture:

3-A list will show up, choose (Banners settings) as shown below:

The below setting options will show up:

-Activate Banners Display: activate or deactivate this plugin.
-Default Alt Text: add a default alt text that is shown when the mouse arrow passing by the banner. this text is shown only if you don’t add another one when you add any banner.
-Maximum number of uploaded banners per time: set the maximum number of uploaded banners once.
-Fading out for each banner by second: time in seconds after which the banner is moved to the next and it is only used when multiple banners are uploaded.
Press (Submit) to add an event, or (Reset) to re enter a new data.
Secondly: to add new banner, follow the below steps:
From the control panel< select plugins> banners> then add as the picture below:

The below template will show up:

-Advertiser: enter the name of the advertisement or banner owner.
-Type: enter the banner type whether it is one banner, multiple banners, content file URL or HTML code.
-Is This A Flash Banner?: this feature is used to enable or disable adding flash banner with SWF format.
Noting that flash banners not recommended any more and many website stops publishing them for security wise.
-Banner: upload the banner you want to add with the following allowed extensions: gif, jpg, mp4 or swf.
-Link: enter the page that will be transferred to after pressing the banner.
-Alt Text: enter an alt text that is shown when the mouse arrow passing by the banner.
-Height & Width: to set the size of the banner.
-Starting Date- End Date: enter the period when this banner is displayed.
-Active: to activate or deactivate publishing the banner.
-Module: choose the module where the banner is displayed.
-Section: choose the sections where the banner is displayed.
-Sort: set the number displaying order.
Press (Submit) to add an event, or (Reset) to re enter a new data.
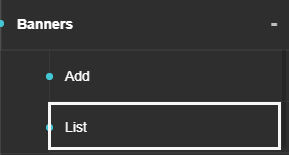
Thirdly: To list, edit, or delete any banner, follow the below:
From the control panel< select plugins> banners> then list as the picture below:
The below picture will show up:

-Edit Icon: is used to edit the banner.
-Delete Icon: is used to delete the banner.
Fourthly: The plugin displaying method on the website:
The block (banner plugin) can be added to any location on the website using the default layout, for more details, click here
 Please Wait...


