Brief: exchanging messages through e-center has been widely developed. The admin can add various contact forms by creating field groups that include these templates to save time and effort instead of the repetition of creating the same template. As well as, messages can be exported in an excel file to save time and effort for the user.
E-center is used for the below purposes:
-create a simple and advanced message template with required features and fields.
-create applications such as (employment, competition, etc.)
-create requests such as (vacation, excuses, website ads, etc.)
-create a communication system between the website and its visitors, by adding a template through which visitors can send news and articles.
-publish the messages content in modules like news, article, or blog.
-export the messages data in an external excel file.
-emailing the administration and receiving replies.
-searching for any messages through the templates fildes.
-sending messages from the admin to members and setting its importance level.
-manage the fields privacy by showing some of them and hiding others.
-the sender verification through the obligatory email address field whether the sender is a member or a visitor.
-rearrange the fields in every template.
-hide displaying templates to the visitors and members without any need to delete them.
-print out messages.
Follow the below tutorial to know how to add templates and fields groups, message your website visitors easily.
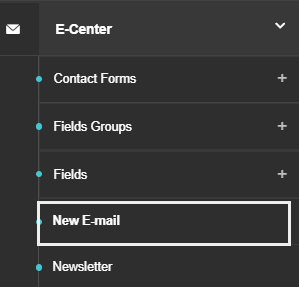
The (E-center) is existed in the control panel side list as shown in the below picture:

Press it and another list includes (contact forms, fields groups, fields,and new email) will show up.
Firstly, you need to create field groups that are used in the messages templates.
Adding new fields:
Fields groups is a tool used to facilitate creating messaging templates, and make it easier for the user to fill in the required data. These fields can be for example, text, date, time, multiple choices, upload file, etc..,)
From the control panel, choose (e-center)> fields groups > then add as shown in the below picture:

The below template will show up:

Enter the group title and press (submit).
To list and add the groups, and list the templates, follow the below:
From the control panel, choose (e-center)> fields groups > then list as shown in the below picture:

The fields groups and contact forms will show up as below:

This page is used to list the contact forms of every field group. On the listing page, you can find the texts of every field. Press (add) to create new fields.
To add fields, press the icon (add) beneath the icon (fields) as shown below:

The below template will show up:

Adding field template:
-Name: enter the field name in English without spaces.
This cell will not be displayed on the website, but it’s an essential one.
-Title: enter the field name that you want to be displayed on the website.
-Description: enter details about the added field and they will be displayed as a brief on the website.
-Type: there are various available types of the fields including:
1-text: is a field in which you can add a text.
2- textarea: it is a larger space to enter a text in which you can use an editor and add a default text to the field.
3-you can add square icons by choosing (checkbox), or circle ones by choosing (radio), or choose (select) as default.
4-you can create a dropdown list that includes options (select).
5-file: you can upload attachments.
6-date: you can add the (date), (datetime), or (time) cells. If you choose the cell (date) a number of previous and upcoming years is required.
7- multifield: this option enables you to add multiple fields in the same cell.
-Fields Groups: select the to which group this field is related.
-Validation: you can set terms to the added content and users need to stick to these terms so the content will be published.
You can allow only numbers, characters or emails to be added, noting that this way helps in the website security.
-Maximum Length: enter the maximum number of characters to be used.
-Unique: by activating this option, any entered data is different and not repeated. This option is useful if you want the members to enter a national ID or mobile number.
-Required: activate this option if the member has to enter data to the field.
-Show Field When Displaying Emails: activate this option if you want to display messages in the control panel, it is used for fields such as (text, textarea, checkbox, select, radio, time).
-Show Field And Value When Send Email Notification For New Message: activate this option if you want to display this field in the sent messages to your email address. This option is used for fields such as (text, textarea, checkbox, select, radio, time).
-For Administration Only: activate this option if you want this field to be displayed in the control panel as an administrative one showing only while you are reading a message, and it is not shown to the visitors. Furthermore, it can be used as a reminder, for example, adding a field to the employment request named “applications status”; so you can filter the accepted and rejected ones by entering the status of each application in this field.
-Display Order: enter a displaying order for this field.
Press (Submit) to save and add the field.
As well as, Dimofinf has allowed you to add individual fields that can be added to groups, noting that this feature is valid when fields are added using the e-center not the groups.
Enter to the control panel> select (e-center)> fields> then (add) as shown in the below picture:

The same previous template will show up that can be corresponded to multiple fields at the same time.
After creating fields and fields groups, you can now easily create the contact form.
Adding contact form:
From the control panel> select (e-center)> (contact forms)> then press (add) as shown below:

The below template will show up:

-Title: enter the form title such as (job, product, etc..).
-Description: enter some details that show the form purpose, noting that these details are displayed beside the template title.
-Fields Groups: This option helps you classify the form fields under fields groups. Drag the field group from the fields groups menu and sort the display order according to your preference.
-Secret Message Form: this option is used for the message security. activate this option, so the member can’t view the message while he is viewing replies.
-Allow Attachments: activate or deactivate uploading attachments.
-Human Verification: it is used to make sure that the received messages are not sma, noting that you can edit it through human verification options in Dimofinf settings.
-Send Notification By Email To The Sender After The Success Of Sending: activate this option to be able message the member using email.
-Max Number Of Messages In The Contact Form: set the maximum number of messages that are allowed to be received. Put (0), so it will be unlimited.
-Activate "Max Number Of Messages In The Contact Form" Daily: activate this option if you want to receive a limited number of messages per day, which means any extra message will be received on the next day.
-A Message In case Of Skip the maximum number of messages: enter auto reply that is sent to visitors if they send messages that exceed the limit set in the previous option.
-New Correspondence Notification: activate this option to receive a notification on your email after receiving a new message in this form.
-New Correspondence Notification Email: enter the email that is used if the previous option is activated.
-Success Message Text In case of Successful Form Submit: enter the message that you want to be shown to the form user informing him that he has succeeded filling the form and the admin will reply to him.
-Active: activate or deactivate the form to be displayed on the website.
-Display Order: set the displaying order of the form on the website.
Press (Submit) to save and add the contact form.
After that, you can list, edit, or delete contact forms.
To list contact form, follow the below:
From the control panel> select (e-center)> (contact forms)> then press (list) as shown below:

The below picture will show up:

You can activate or deactivate by pressing (active), or (select all) then (save). The forms arranging is shown beneath the list (sort). As Well as, the form messages number is shown beneath (emails) list. Furthermore, you can search for messages, edit or delete them through (action) cell.
Search for messages:
You can search for messages received since a long time by following the below:
From the control panel> select (e-center)> (contact forms)>(list)> then press (search) as the below picture:

Then, you are transferred to a page where you search for messages by setting the date and status of them, and press (submit) to get results.
List emails:
You can list, print, delete, or export emails and save them on your device.
To list emails, from the control panel> select (e-center)> (contact forms)>(list)> then press (list) as the below picture:

Open emails:
To open emails, execute the previous step, and received emails will be shown.
Press the required one, and all its details appear.
The sender details, message content, and replies are shown up, so you can add this email to any module such as (articles, or news).
If you choose any module, a template will show up, fill it as you are able to add a new title, or content. Then press (submit) to be saved in the module.
As well as, you can delete emails and block the sender. You can execute this action by using (security options) in the (blocked emails) field where you can unblock any sender also and only delete his message.
Reply to senders and track emails:
This a featured option for the admin to reply emails, as when he selects an email, it is added to the favorite list, so it’s coloured differently.
You can track messages by pressing (reply to this email) and a form will show up including an icon to track the email.
Searching for emails:
E-center provides the option of searching for emails using different search tools such as (email address, content, title, or replies) which facilitates reaching any required one.
Enter the key word, set the used search tool, and press (search) to get results.
Sending email:
You can send an email to any member or visitor by adding his email address.
From the control panel> select (e-center)> then press (New Email) as shown below:
The below template will show up:

Fill the required fields and press (send email).
-Newsletter: press here to view the newsletter tutorial.
 Please Wait...


