Brief: Languages option is one Dimofinf V.5 outstanding feature by which you can (Add, edit, or find) languages and phrases.
You can reach Languages feature by following the below:
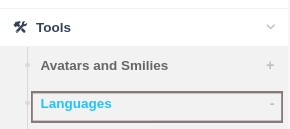
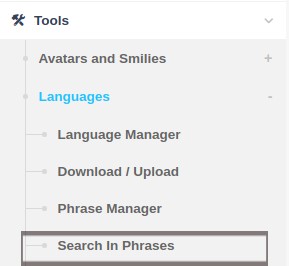
From Cpanel, select Tools, then languages as the below picture:
Language Manager:
This feature enables you to edit languages, choose the default language for the website, and add new one by following the below:
From Cpanel, select Tools >languages > then Language Manager as the picture below:

Edit/ Translate (Language) Phrases Icon: is used to edit the phrases translation or restore the main vocabs before being translated.
Edit Setting Icon: is used to edit language setting ad text direction.
Delete: is used to delete the language.
Add a New Language:
Dimofinf V.5 enables to add a new language smoothly by uploading the language file using the Cpanel, then press ( Add a new Language) and the below picture will show up:
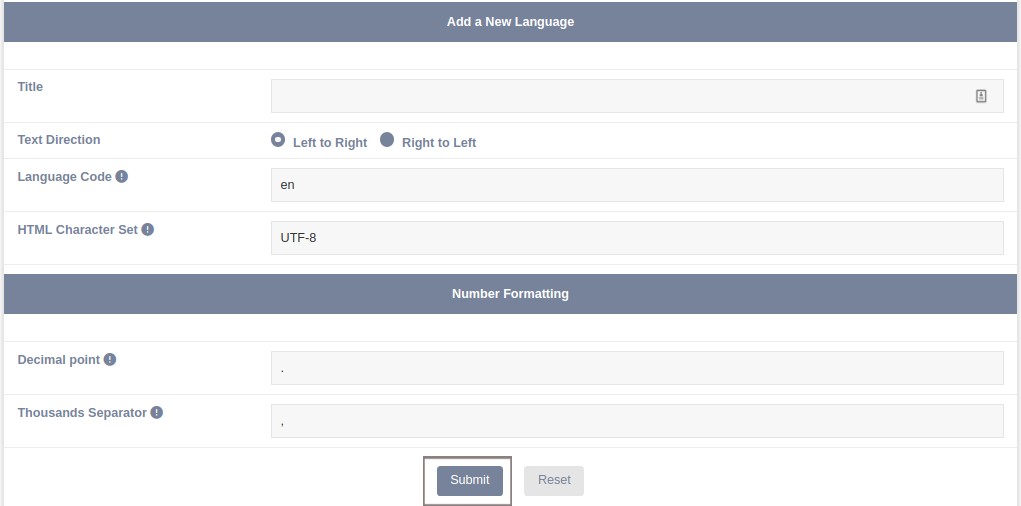
- Title: is the language name that will be added.
- Text Direction: set the language direction whether from right to left or left to right as English language.
- Language Code: enter the language code , for example, “ar” for Arabic and “en” for English.
- HTML Character Set: is used to set the header language included in html folder, in order the character not to be shown as symbols incase the encoding is not matching the one selected .
- Decimal point: is the symbol used to separate between integers and decimals. In case you want to use a space instead of symbol, use the underscore (_).
- Thousands Separator: is the separation symbol used for thousands separator, for example, 1.02. In case you want to use a space instead of symbol, use the underscore (_).
- Then press (Submit) to add a new language.
The language data has been added, and the next step is to upload the language file that can be executed following the next steps:
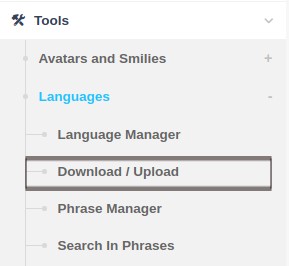
Download/ Upload:
Dimofinf V.5 enales to download a language to your device, or upload a language from yours by following the below:
From Cpanel, select Tools> Languages> then Download / Upload as the picture below:
The below template will show up:

The fields will appear in a table name (Download) incase you want to download a language to your device:
- Languages: select the language you want to download.
- Product: select the product you want to download its language; which means a part of the CMS language or the whole one.
- File Name: enter the name that the file will be downloaded with.
- Include Custom Phrases: some custom phrases are added by the admin for certain languages.
- Just import phrases: If yes is selected, phrases will be downloaded without any settings.
- Press (Download) , and the language will be downloaded to the device.
To upload a language, these fields will appear in table named (Import language XML File)
- EITHER Upload the XML file from your device: you can upload the file to the website.
- OR Import the XML file from your server: set the file path hosted on the server and it will be uploaded.
- Overwrite Language: Selecting a language here will cause the imported language to overwrite an existing language. Leave blank to create a new language.
- Title for Uploaded Language: enter the title of the imported language or leave it blank and the language file name will be used.
- Ignore Language Version: activate or deactivate Dimofinf language, even if the language file is different from Dimofinf Version.
- Press (Upload) and the file will be uploaded to the website
Phrase Manager:
Dimofinf allows the admin to manage and edit phrases by following the below tutorial:
From Cpanel, select Tools> languages> then Phrase manager:

The below page will show up:
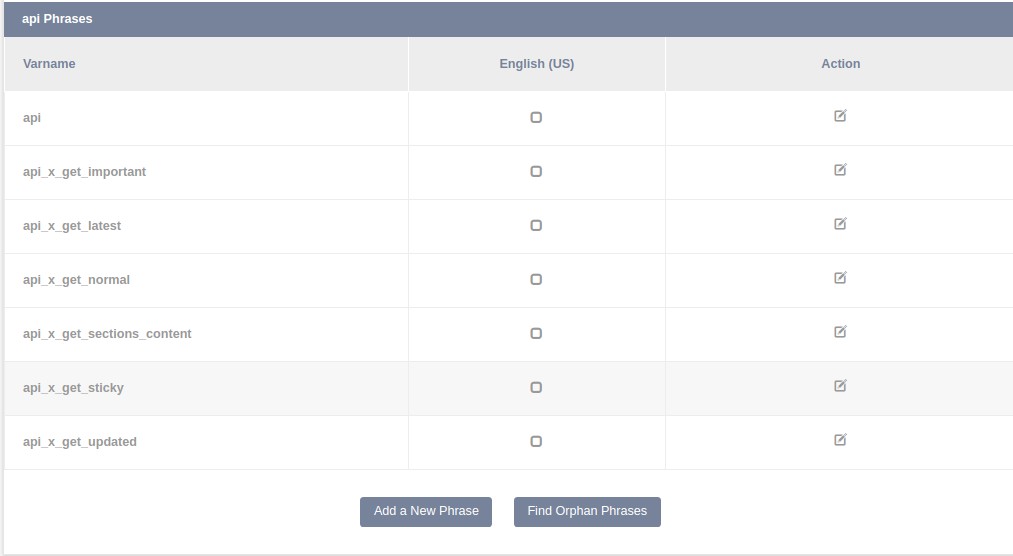
The varname and valid languages will show up, and you can modify by pressing (Edit Icon) included in the Action box.
At the page bottom, there is the (Phrase Section) that includes a list of the CMS phrases section in which you can choose any section and edit it. Besides, the number of each page phrases will appear to set the number of used phrases in every page.
A new phrase can be added by pressing ( Add a new Phrase) , and you will be directed to the below page:
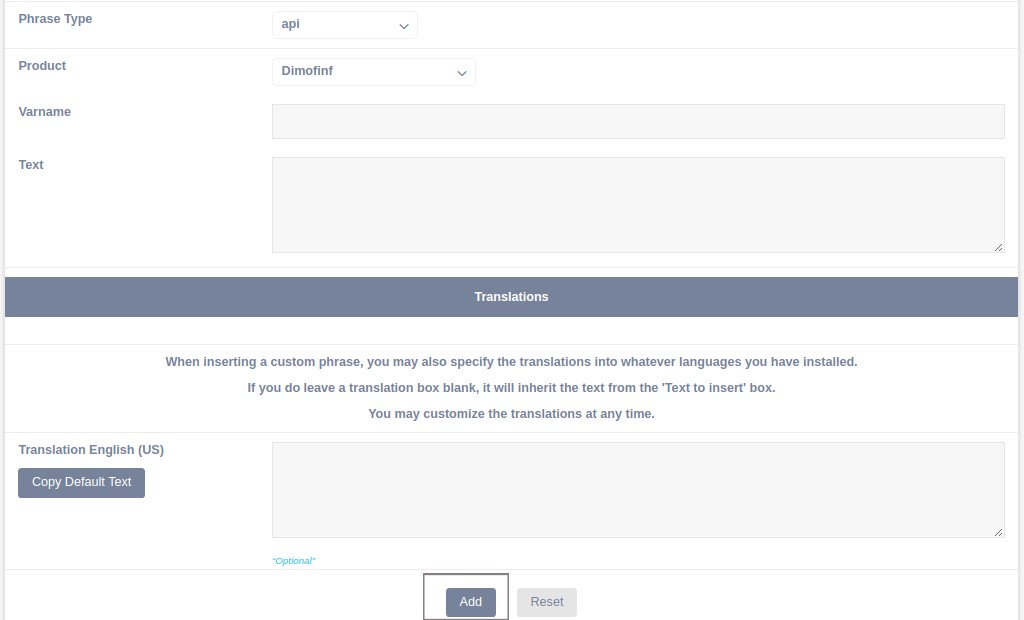
- Select the section and product that the phrase will be added to. Product refers to modules and plugins.
-Enter the Varname, and the text of the add phrases varname.
-Enter the phrase translation whether Arabic or English, noting that you can use the default language.
-The new added phrases can be deleted by pressing (Delete) icon, included in (Action) box as the below picture:
Search in Phrases:
This option allows to search phrases and edit them to fit your website, as you can change the news module name to (our news) by following the below:
From Cpanel, select Tools> languages> then Search in Phrases as below:
The below page will show up, and it is divided into two parts; ( Search in Phrases) and ( Find and Replace in Languages)
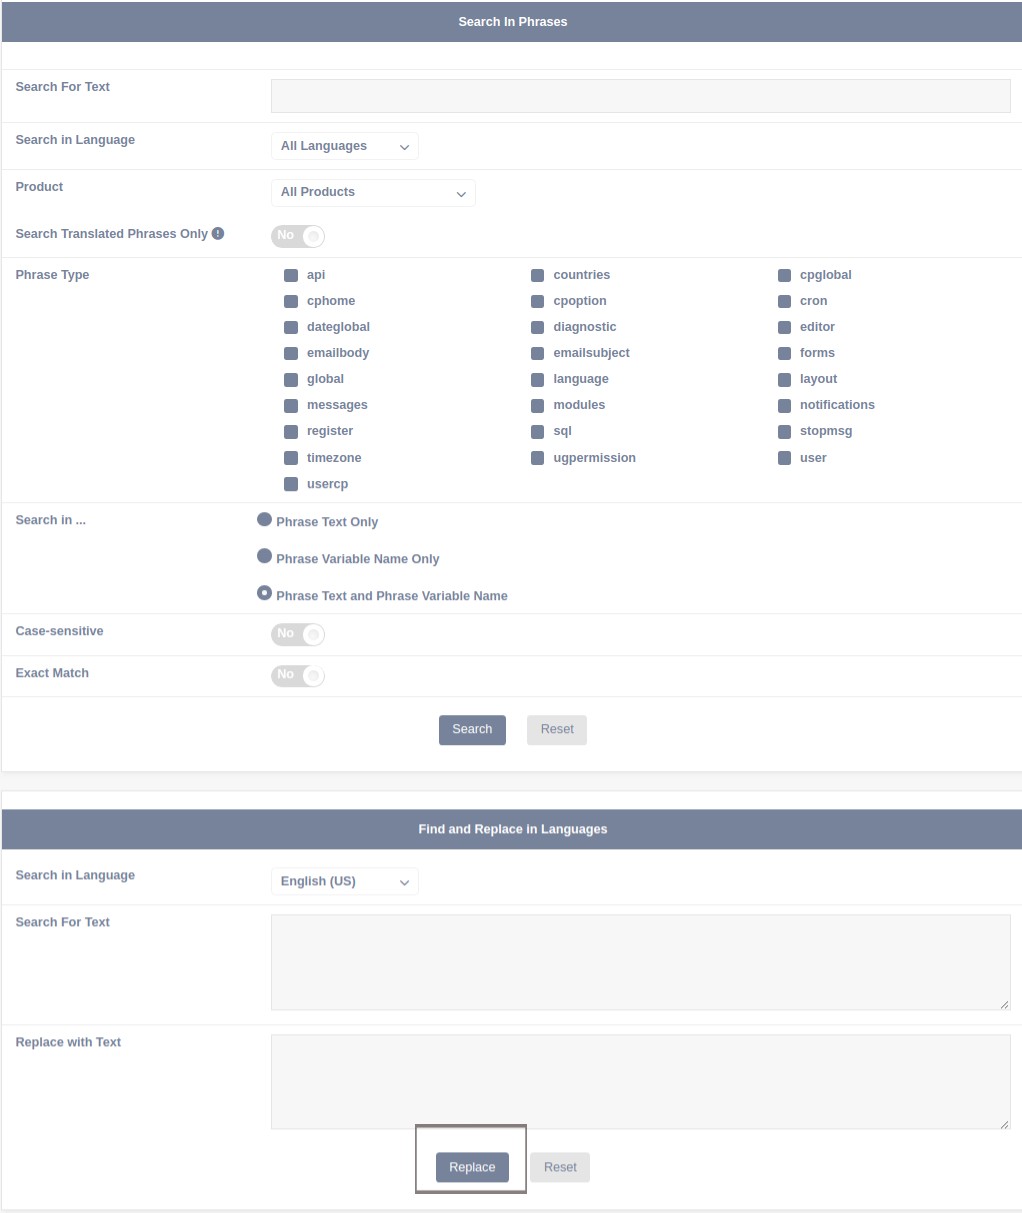
- To search a text, choose its language and choose the product (modules, plugins or CMS core). As well as, you can activate or deactivate searching in translated phrases. In addition, searching can be tackled by varname or phrase or both. In case of activating “exact match”, any odd varnames or phrases will be avoided.
-Press (Search) and the below page will show up:

Press the icon (Edit), and the phrase page will be shown in which you can delete and edit to fit the website.
The second part is (Find and replace in Language) as the below picture:

Search the text, and replace it with the phrase you want, then press (Replace) and the below page will be shown:
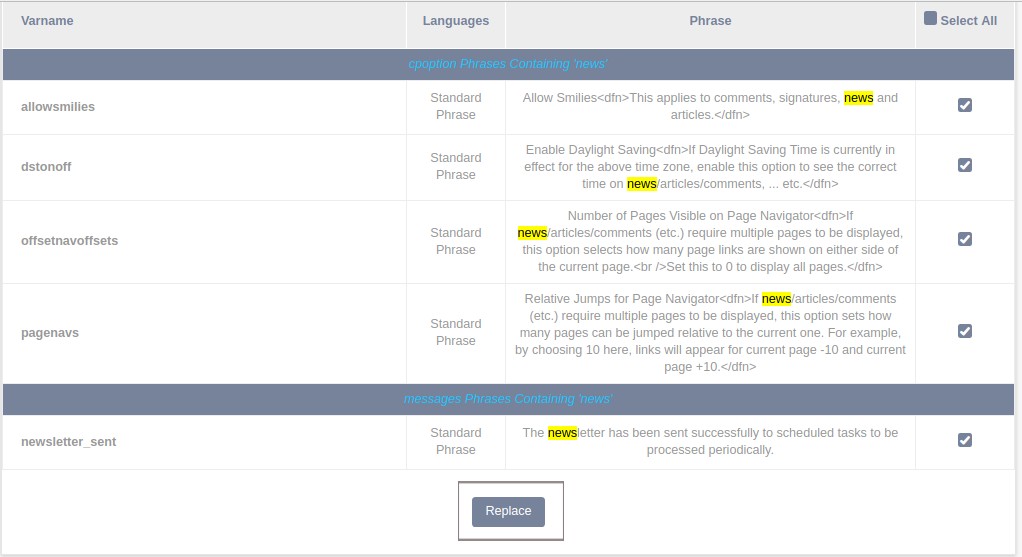
You can (Select all) and press (Replace) and the new phrase will be added instead of the replaced one.
 Please Wait...


