 يرجى الانتظار ...
نبذة : من خلال هذا الشرح سوف نقوم بترقية برنامج ديموفنف من الإصدار 3.0.0 إلى الإصدار 4.0.0 على موقعك بخطوات سريعة وبسيطة
خطوات التجهيز :
1. قم بغلق موقعك من خلال إعدادات برنامج ديموفنف عن طريق لوحة تحكم البرنامج.
2. قم بإنشاء قاعدة بيانات جديدة من لوحة تحكم الاستضافة cPanel.
3. قم بعمل نسخة احتياطية لقاعدة البيانات الأساسية ، وتكون النسخة على القاعدة التي تم إنشاؤها بالخطوة السابقة.
ملاحظة مهمة : إذا كنت ستقوم بالترقية على مجلد فرعي قبل عرضه للزوار، فيجب أن يكون اسم هذا المجلد الفرعي upgrade فقط ، ولن يعمل البرنامج بخلاف هذا الاسم.
خطوات الإعداد :
للحصول على نسختك من برنامج ديموفنف تفضل بالدخول إلى لوحة التحكم الخاصة بك في موقعنا ، واتباع الخطوات التالية :
1. قم بتسجيل الدخول لمنطقة العميل الخاصة بك بموقع شركة ديموفنف باستخدام ( بريدك الإلكتروني وكلمة المرور الخاصة بك ).
2. سوف تظهر لك رئيسية منطقة العميل ، قم بالضغط على ( الخدمات الفعالة ) ، سوف تظهر لك قائمة بكل خدماتك لدينا.
3. قم بالضغط على زر ( مشاهدة البيانات ) أمام ترخيص برنامج ديموفنف الخاص بك.
ستظهر لك صفحة جديدة تحتوي على بيانات المنتج ، أهمها :
مفتاح الترخيص : ( ستحتاج لنسخه ولصقه في ملف config.php قبل بدء التنصيب بالخطوة رقم 7 من خطوات الإعداد ).
دومين الترخيص : ( هو الدومين المرخص له تركيب ديموفنف ).
تنزيل ملف نسخة ديموفنف:
4. قم بتنزيل نسخة ديموفنف على جهازك.
5. قم بفك ضغط الملف.
6. افتح المجلد include وستجد داخله ملف config.php.new غير اسم هذا الملف إلى config.php ( امسح الامتداد .new من اسم الملف ).
7. افتح الملف config.php بأي محرر نصوص ، وأضف البيانات التالية في الأسطر الموضحة :- مفتاح الترخيص: ويظهر مفتاح الترخيص بصفحة الخدمة بمنطقة العميل الخاصة بك ، كما تم التوضيح مسبقًا
اسم قاعدة البيانات [dbname]: الذي تم انشائها في الخطوات السابقة
اسم مستخدم قاعدة البيانات [dbuser]: الذي تم انشائه في الخطوات السابقة
كلمة مرور مستخدم قاعدة البيانات [password]: الذي تم انشائها في الخطوات السابقة
CODE :
$setting ['LicenseKey'] = '';
$setting['Databasename'] = 'dbname';
$setting['MasterServerusername'] = 'dbuser';
$setting['MasterServerpassword'] = 'password';
احفظ التعديل.
8. قم برفع مجلد النسخة المفكوك الضغط عنه إلى موقعك في المكان الذي ترغب في تنصيب ديموفنف به ( أو قم برفع الملف مضغوطًا ، ومن ثَم فك الضغط عنه من خلال السي بانل ).
9. قم بإعطاء المجلدات والملفات التالية تصريح 777 من خلال السي بانل.
مجلد : contents
مجلد: styles
مجلد : contents/datastore
مجلد: contents/datastore/layout
ملف: contents/datastore/datastore_default.php
ملف: contents/datastore/rout.data.php
ملف: contents/datastore/l.dat
10. قم بنقل محتويات مجلد contents ببرنامج ديموفنف 3 إلى نسختك الجديدة.
خطوات الترقية :
- قم باستدعاء ملف upgrade.php من خلال المتصفح حسب المجلد الذي رفعت به ديموفنف ، كمثال :
http://www.DOMAIN.TLD/install/upgrade.php
مع مراعاة استبدال DOMAIN.TLD بدومين موقعك.
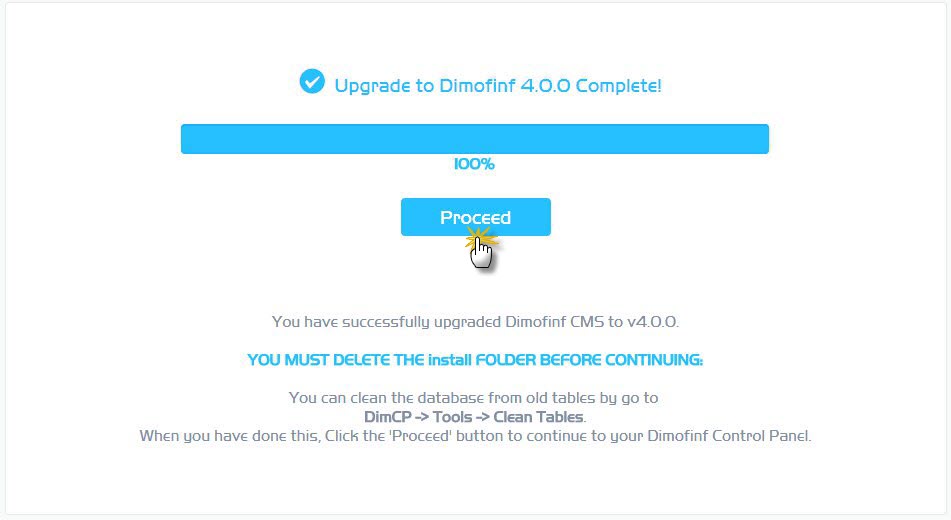
1. ستظهر لك الرسالة الترحيبية لبدء خطوات الترقية بالخطوة الأولى وهي تحويل ترميز قاعدة البيانات إلى UTF8، قم بالضغط على Proceed ، كما بالصورة التالية :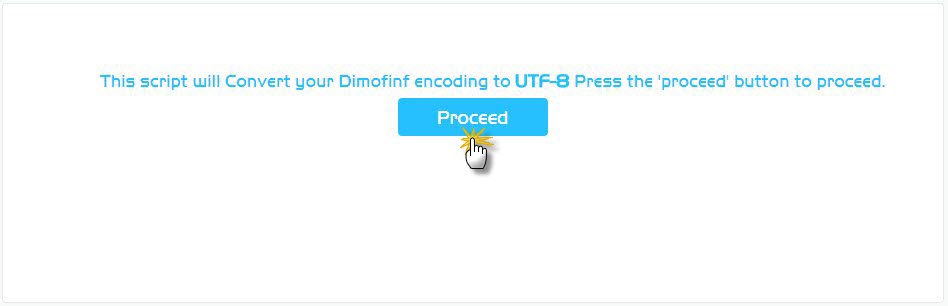 من الممكن أن تكون هذه العملية طويلة بعض الشيء ، وذلك حسب حجم قاعدة البيانات الخاصة بك ، فلا تقلق من عملية التأخير.
2 ابدأ عملية الترقية للنسخة الرابعة ، قم بالضغط على Proceed ، كما بالصورة التالية :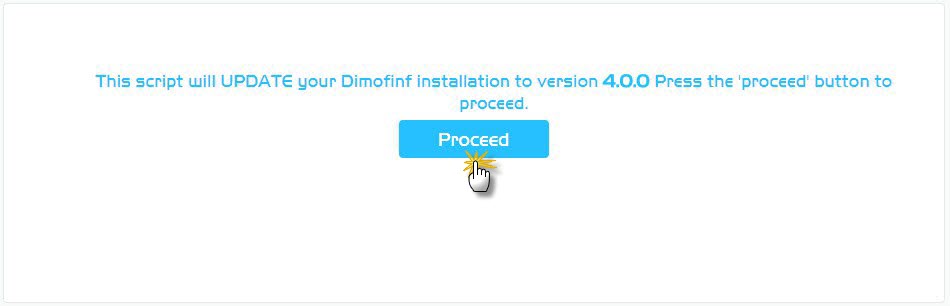 3. سيظهر لك نموذج بالموديولات والبلجنات المفعلة مسبقًا -بالنسخة الثالثة- سيتم اختارها تلقائيًا من قِبل النظام ، كما بالصورة التالية.
- قم باختيار البلجنات والموديولات التي تريد تفعيلها ؛ ويمكنك الضغط على زر Ctrl بلوحة المفاتيح للاختيار المتعدد . وبعد الانتهاء من عملية الاختيار قم بالضغط على زر Proceed كما بالصورة السابقة.
4. بعد ذلك سوف يظهر لك صفحة بها بعض الاعدادات العامة، كما بالصورة التالية :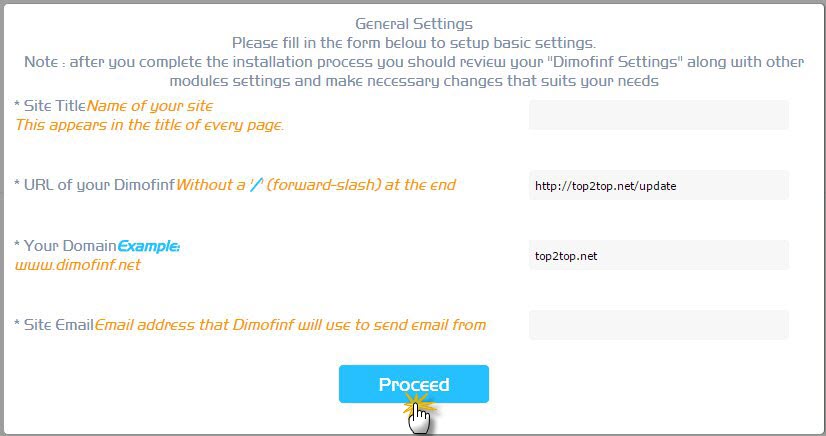 Site title : وهو الاسم الخاص بالموقع ( مثل جريدة الرياض ، صحيفة سبق ، ... إلخ ).
URL of your Dimofinf : وهو رابط برنامج ديموفنف على الموقع الخاص بك.
Your Domain: وهو النطاق الخاص بموقعك.
Site mail: وهو البريد الإلكتروني الخاص بموقعك ، والذي سيتم اعتماد المراسلات الواردة من موقعك عن طريقه.
-في حالة الترقية على مجلد فرعي يجب كتابة اسم المجلد بعد علامة السلاش (/) في حقل الكوكيز ، وإضافة سلاش بعد اسم المجلد.
بعد تعبئة هذا النموذج قم بالضغط على زر Proceed كما بالصورة السابقة.
5. بعد أن يكمل النظام بعض عمليات التنصيب سوف يظهر لك نموذج جديد يطلب بعض البيانات الخاصة بمدير الموقع ، كما بالصورة التالية :
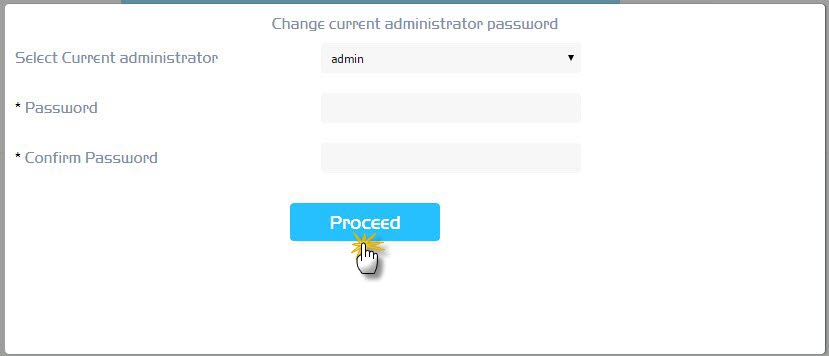
Password: وهي كلمة المرور الجديدة الخاصة بحساب مدير الموقع.
Confirm Password: تأكيد لكلمة المرور السابقة.
بعد تعبئة هذا النموذج قم بالضغط على زر Proceed كما بالصورة السابقة.
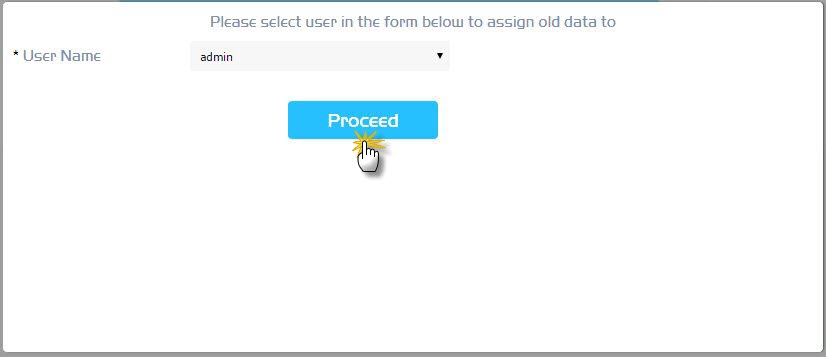
6. بعد ذلك سوف يطلب منك النظامُ اسم المستخدم الذي سوف يتم وضع كافة بيانات الموقع باسمه ,قم باختيار المستخدم المطلوب ، ثم قم بالضغط على زر Proceed كما بالصورة التالية:
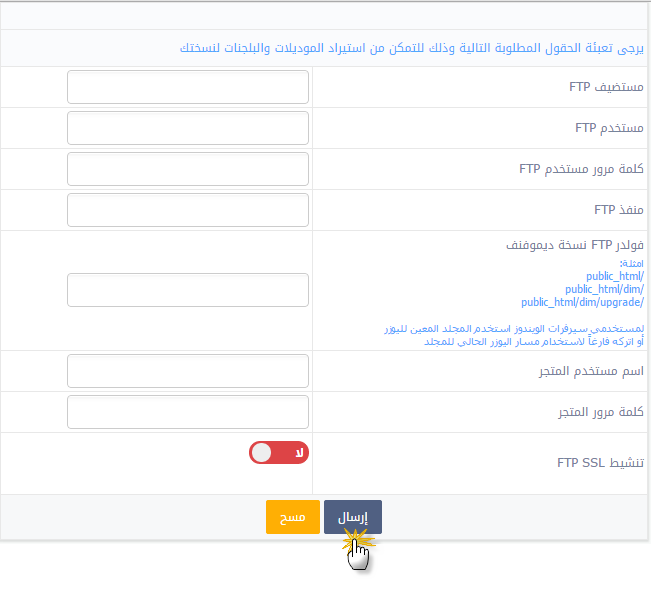 - قبل شرح النموذج السابق ؛ بعد انتهاء عملية الترقية سوف تجد بيانات المتجر الخاصة بك مرسلة إلى البريد المسجل في حسابك بموقع شركة ديموفنف ، لذا قم بالدخول إلى بريدك للحصول على البيانات.
FTP User: اسم المستخدم لحساب FTP.
FTP Password: كلمة المرور لحساب FTP الخاص بك.
FTP Port: رقم المنفذ لحساب FTP الخاص بك.
CMS FTP Folder: اسم المجلد الخاص ببرنامج ديموفنف والذي يحوي ملفات البرنامج.
Store Username: اسم المستخدم الخاص بك بمتجر برنامج ديموفنف (يرسل لك على البريد الالكتروني عند شراء نسخة ديموفنف).
Store password: كلمة المرور الخاصة بك بمتجر برنامج ديموفنف (يرسل لك على البريد الالكتروني عند شراء نسخة ديموفنف).
Use SSL FTP: يمكنك من تفعيل بروتوكول الدخول الآمن عن طريق الاتصال بـ FTP الخاص بك.


