1- Press on "FILE"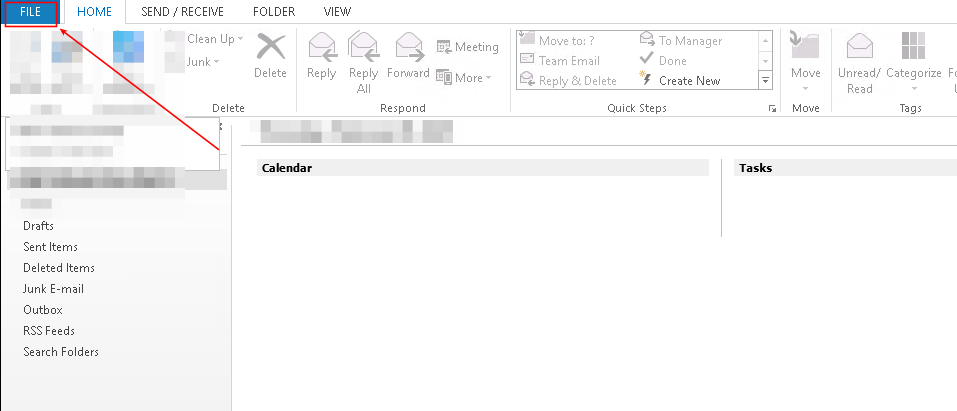
2- To add your account press on "Add Account"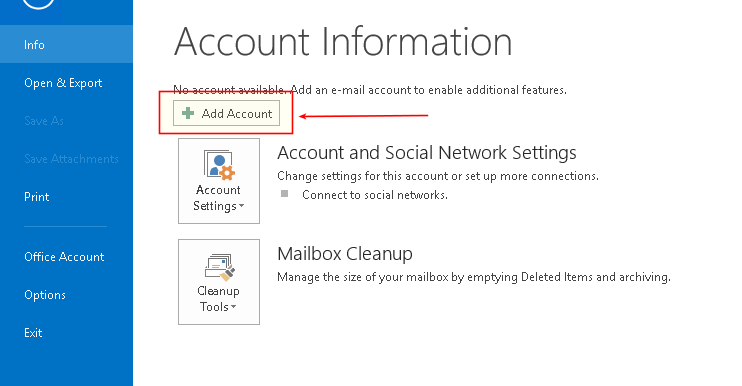
3- Press on "Manual setup or additional server types"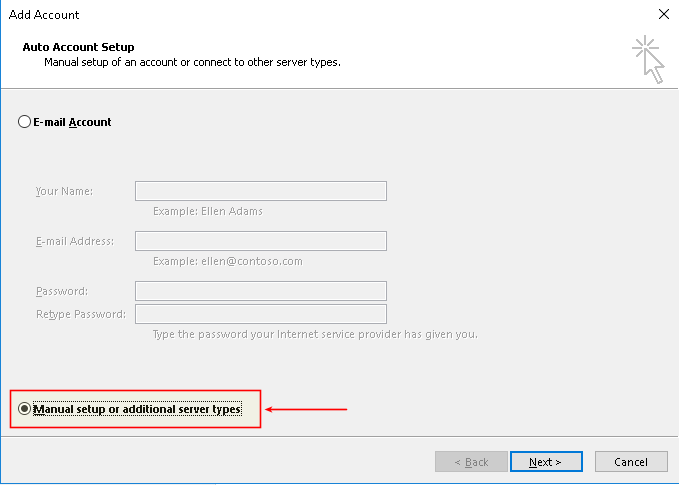
4- Choose "POP or IMAP"
5- Fill the fields wuth your email account data as next image by changing the required as your email informations.
- Your Name: the name you want to show up to the receiver.
- E-mail Address: your website email, for example: ([email protected]).
- Account Type: choose POP3.
- Incoming mail server: it should be as follows: (mail.domain.com).
- Outgoing mail server: it should be as follows: (mail.domain.com).
- User Name: it should be as follows: ([email protected]).
- Password: the email password.
- Require login using Secure Password Authentication: mark this checkbox.
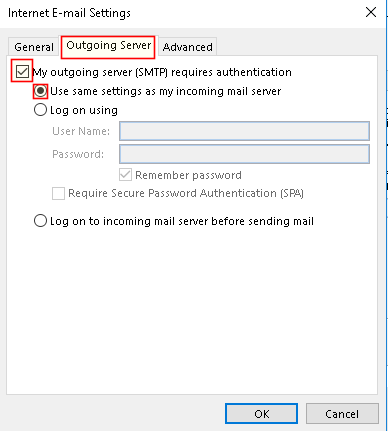
6- After you fill the above informations, Press on "More Settings". A new window will appear, Press on "Outgoing Server" and choose the next:
- Mark the checkbox (My outgoing server (SMTP) requires authentication).
- Select (Use same settings as my incoming mail server).
7- In the same windows, Press on "Advanced", change as next:
- Incoming server (POP3) : 995
- Mark the checkbox (This server requires an encrypted connection).
- Outgoing server (SMTP) : 465
- Choose "SSL" from menu "Use the following type of encrypted connection"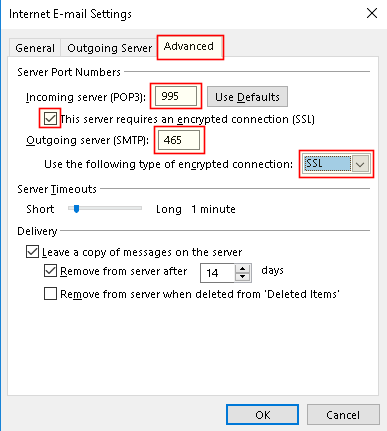
- Then Press on "OK"
8- You will return to Outlook previous menu in step 5, Click on "Next". Outlook will check your email login by informations you filled and new windows will appear by connection to email success, Then click on "Close".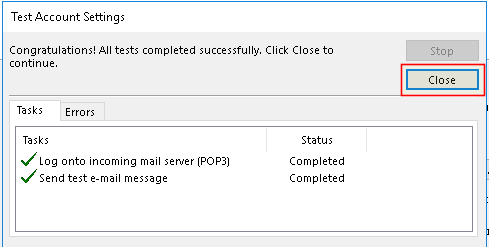
9- Email configuration completed now. Press on "Finish".
 Please Wait...


