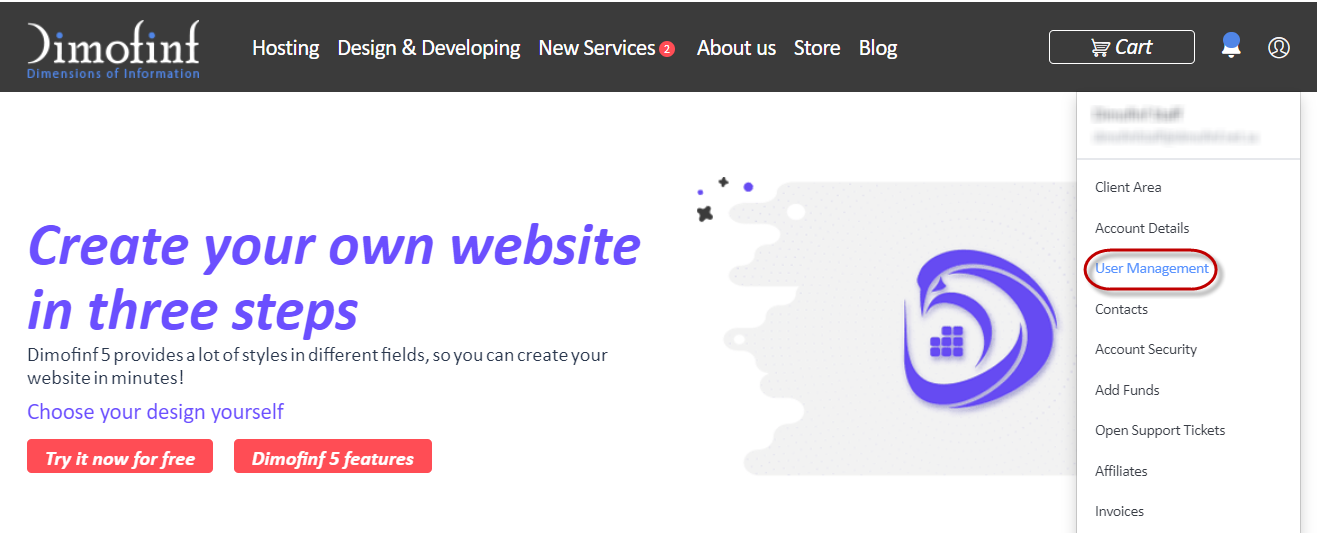
How to invite a new user from your Client Area?
- Login to your Control Panel in Dimofinf website with your email and password.
- Choose (User Management) from Home Page.

- Press (Invite New User).
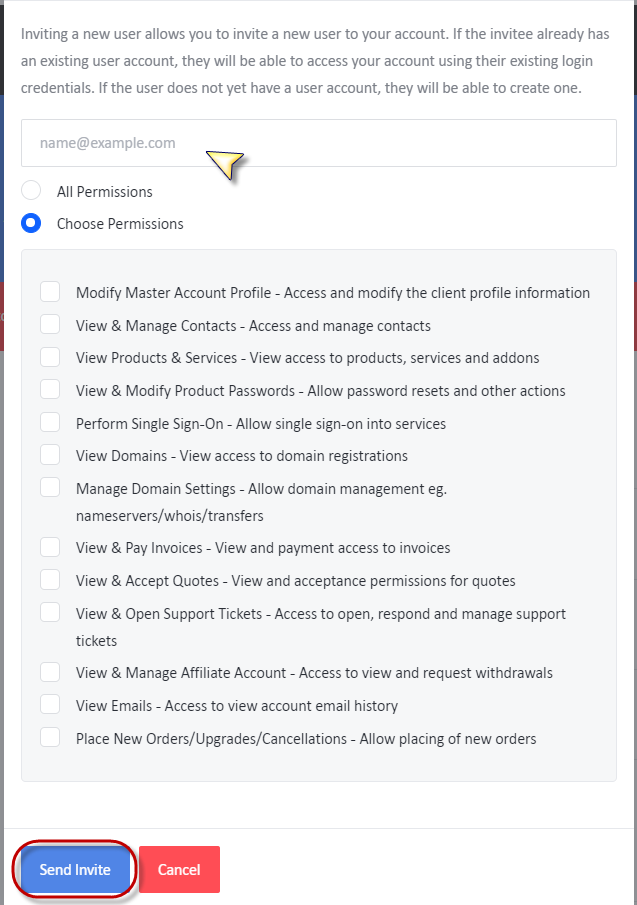
- Type the email of the new user:
When you press on (Choose Permissions) by marking its checkbox, User permissions will be set.
1-Modify Master Account Profile:
When enabled, the sub-account owner can edit the master membership (master account).
2-View & Manage Contacts:
When enabled, the sub-account owner can view and manage other sub-accounts.
3-View & Modify Product Passwords:
When enabled, the sub-account owner can view and edit the passwords of your account products and services.
4-View Products & Services:
When enabled, the sub-account owner can view the account products and services.
5-View Domains:
When enabled, the sub-account owner can view the account domains.
6-Perform Single Sign-On.
7-View & Pay Invoices:
When enabled, the sub-account owner can view due invoices and pay them.
8-Manage Domain Settings:
When enabled, the sub-account owner can manage and edit the settings of the account domains.
9-View & Open Support Tickets:
When enabled, the sub-account owner can view old support tickets and submit new tickets.
10-View & Accept Quotes:
When enabled, the sub-account owner can view quotes and accept them.
11-View & Manage Affiliate Account:
When enabled, the sub-account owner can view the calculated points, manage them, and use them within the account.
12-View Emails:
When enabled, the sub-account owner can view the messages Dimofinf had sent to the email of the master account.
13-Place New orders/Upgrades/Cancellations:
When enabled, the sub-account owner can place a new order, request an upgrade, or cancel any service in the account.
When you finish editing and adding Permissions, press (Send Invite).
- After accepting the invitation by the new user, Press (Register) and fill his data :

- After completing the data, press (Register).
 Please Wait...


