How to add a colony?
1- login to the C Panel
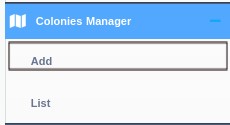
2- From (colony management) list, press (Add ) as shown in the below picture
3- (Add colony) template will show up as below:
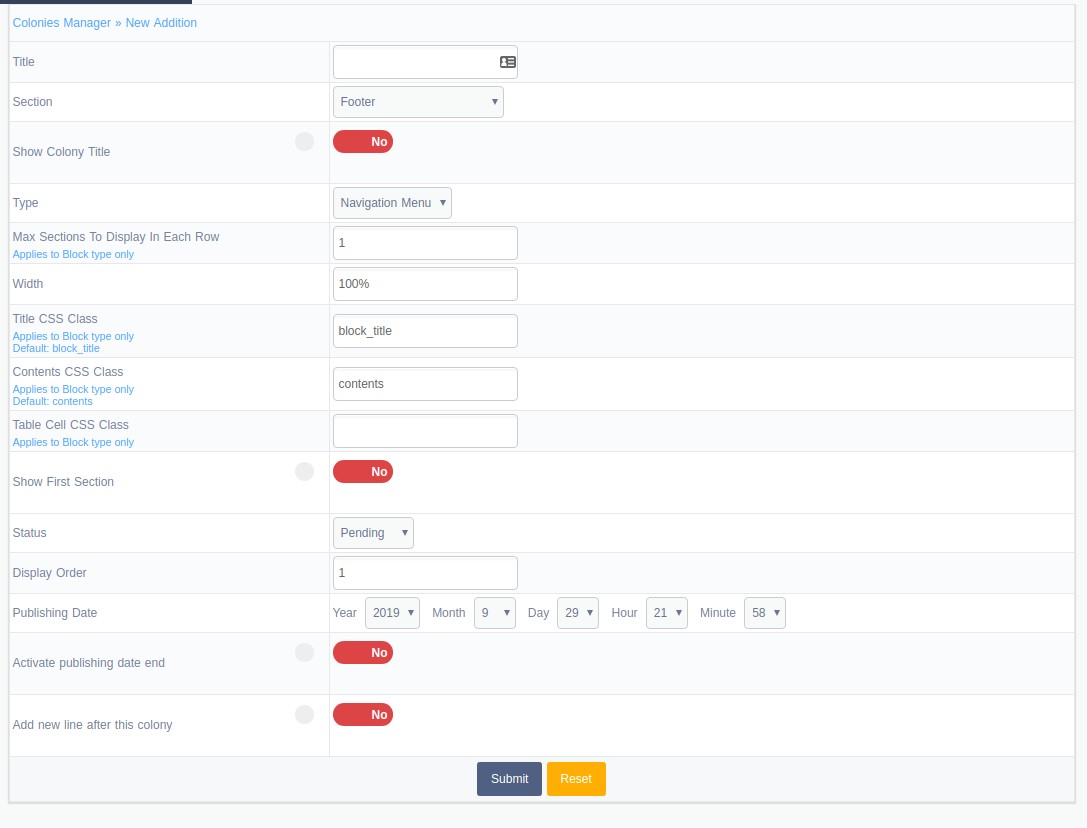
The template is explained in order:
- Title: The shown name of the colony ( it is recommended to be short, compatible with the context, and free of punctuation). As It would help in search engines.
- Section: is the name of the content section included in this colony.
- Type: is used to set the colony type.
- Max Sections To Display In Each Row: in case the type is a template, the sections numbers should be set in order to be viewed properly.
- Width: it enables to select a certain pattern for the created colony.
- Title CSS Class: it enables the colony template to be viewed using a special style.
- Contents CSS Class: is the style of the colony content in the template.
- Table Cell CSS Class: is the style of the cells included in the colony table.
- Show First Section: is the section status. In case the section status will not be shown currently, choose (No) and it will not be shown on the CMS interface.
- Status: This option is used to set the colony status whether to be; “published or waiting approval”.
- Display Order: it is used to keep the colonies to be in order.
- Publishing date: is used to set the publishing date.
- Activate publishing date end: In case of choosing (Yes), another option will show up (the suspension date); on this date, the colony will be automatically suspended.
- Add new line after this colony: it adds a <br> or new line after the colony end.
 Please Wait...


