Brief: This tutorial shows how to install Dimofinf V.5 following simple and easy steps.
Preparation Steps:
To install your new version, login to cpanel and follow the below steps:
1- Login to your client area on Dimofinf website using your (email and password).
2- Your client area will show up, press (Services), and a list of your services will appear.
3- Press (View Details) existed in front of Dimofinf CMS License.
A new page includes the product data will show up as below:
License Key: (you need to copy the license key and paste it in config.php folder before starting the installation step no.7. )
License Domain: ( is the licensed domain to install Dimofinf CMS)
Download the version folder
4- Download the version folder to your device.
5- Upload the extracted folder to a location of your website in which you want to install the CMS ( or upload the compressed folder, and extract it through the cpanel)
6- Open the folder (include), and will find (confing.php.new)folder inside, change its name to (confing.php). (delete the extension “.new”)
7- Open the folder (config.php) by pressing the right button of the mouse and press edit, add the required data as shown below:

License Key: appears in the client area.
Database Name: enter the name of the created database instead of dbname.
Master Server Username: enter the username of the database instead of dbname.
Master Server Password: enter the paseword of the database instead of dbname.
Save changes.
Installation Steps:
-Call the folder (upgrade.php) through the browser by the folder used to upload the version,
Ex. http://www.DOMAIN.TLD/install/upgrade.php
Or
http://www.DOMAIN.TLD/folder/install/upgrade.php
Considering that you need to replace (DOMAIN.TLD) with the website domain, and replace the folder name in the second case.
1- The Welcome message will show up to start the first step of upgrading by filling data as shown below:

The explanation of the previous template:
-LicenseKey: the license key mentioned in Config folder as step (7).
-FTP Host DOMAIN OR IP: the name of the server that hosts the FTP account.
-FTP USERNAME: The username of FTP account.
-FTP PASSWORD: The password of FTP account.
-CMS FTP Folder: the name of the folder that includes all the CMS files.
-FTP Port: the number of FTP port.
-connection SSL FTP: enable you to activate the secured login protocol by connecting your FTP.
Press (Submit)
Another template will show up to fill some settings as the below picture:

The explanation of the previous template:
First part is related to the admin data to login to the website cpanel:
User Name: is the username that will be entered to login to the cpanel.
Display Name: the displayed name shown to other members.
Password: enter the new password.
Confirm Password: confirm the enter password in the previous step.
Email Address: is used email address for logining in.
The second part is related to the website data:
-Site title : is the website name such as, ElRyad newspaper, Sabaq newspaper,..etc)
-URL of your Dimofinf : Dimofinf CMS link on your website.
-Your Domain : your website's domain name.
-Path to save cookies: is the path of save cookies on server. \
-Site mail: the website mail that receives the incoming messages.
-Language: choose the default language of your website.
Press (Submit)
A template of the installation process will show up as the below picture:
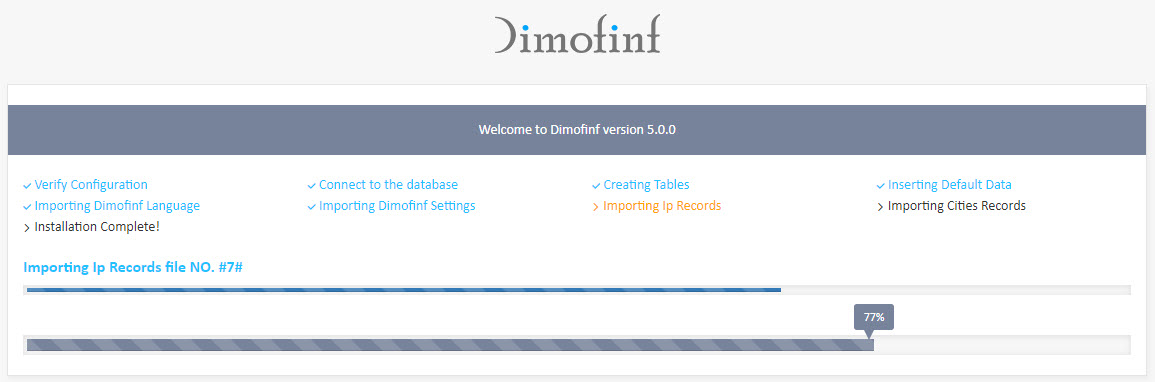
Only few seconds and the below message will appear stating that the installation process has been done and your website is active right now.

Press (Proceed), and you will be directed to the CMS control panel.
The below template will show up to enter the username and password:

Username: is the entered username to login to the cpanel.
Password: is the enter password to login to the cpanel.
You can open your website using the below link
http://www.DOMAIN.TLD
And login to the website cpanel using the below link
http://www.DOMAIN.TLD/dimcp
Considering that you will change DOMIAN.TLD into you website domain.
The installation process has ended, and you can now manage the CMS easily.
 Please Wait...


